Advertisement

Urban Terror Blogs
BladeKiller's blog
Under the Jade Dragon Snow Mountain
posted Wednesday, 16 September 2020
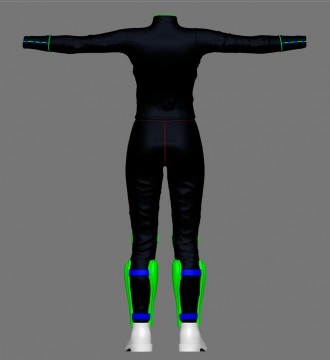
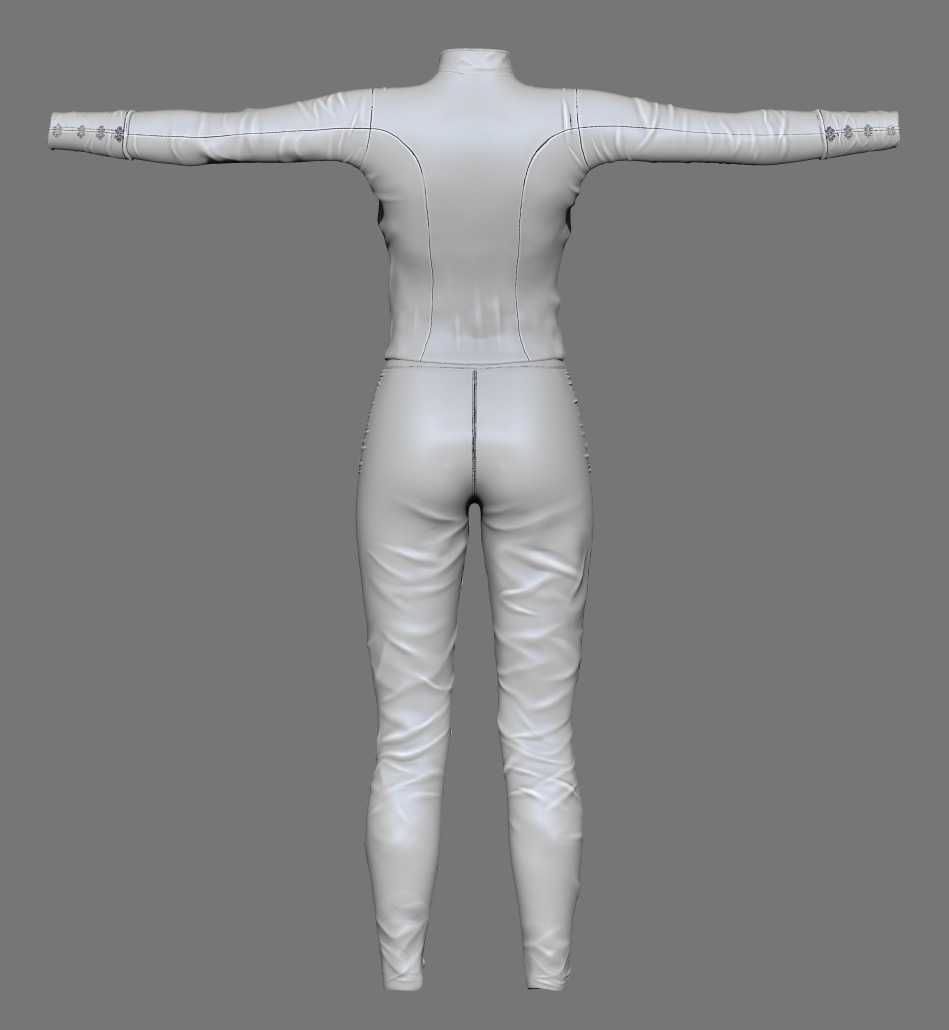
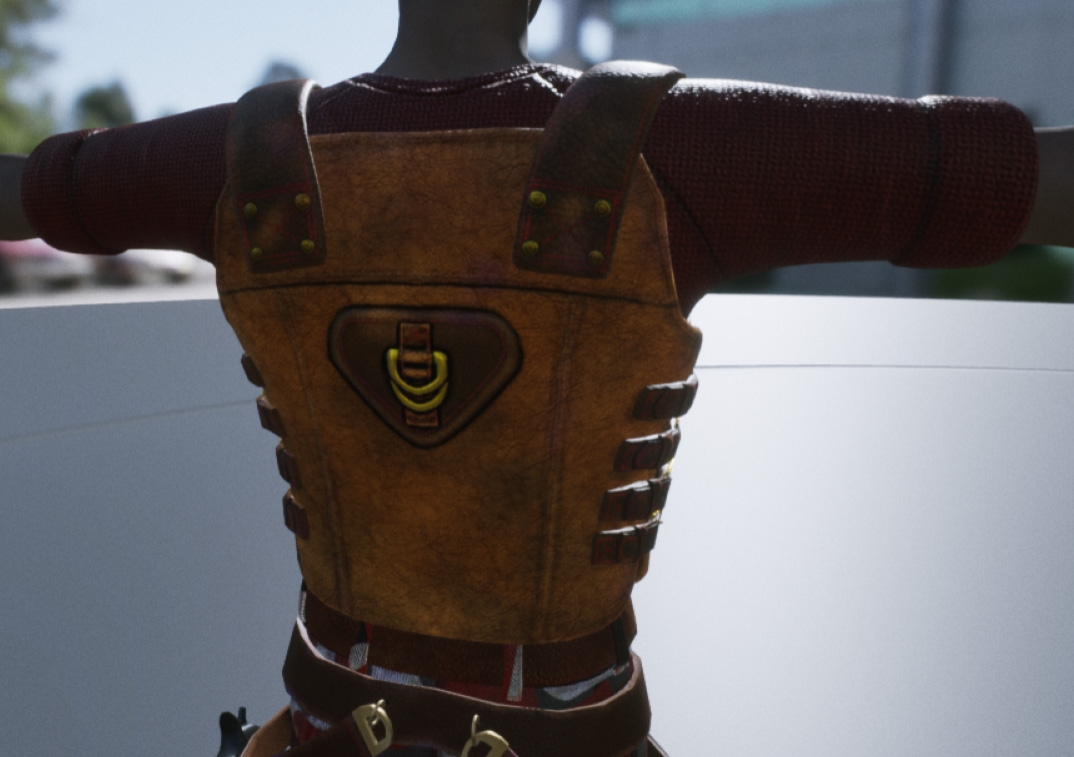
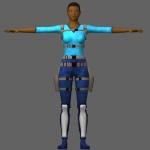
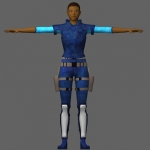
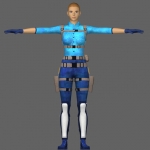
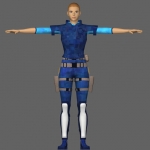
It's been a while since my last blog so I thought I would show you how the first of the Asian characters is coming along. Her name is Jade. She is named for the beautiful snow-capped mountain that stands guard over her home town of Lijiang in Yunnan, China. Lijiang was an economic and transportation hub along the Ancient Tea Horse Road and its intricate system of waterways, as well as its location, make it an important strategic city in Urban Terror 5. Jade is a member of the UTRT who protect the town from those who would destroy its irrigation system and water network.
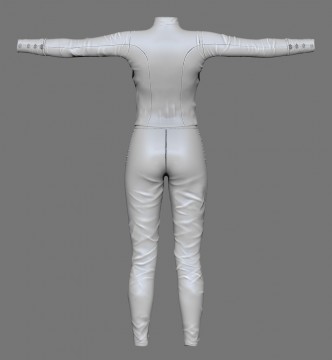
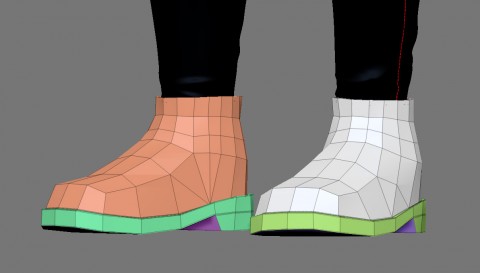
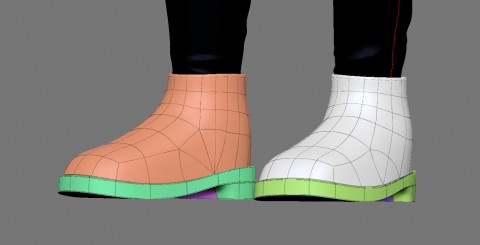
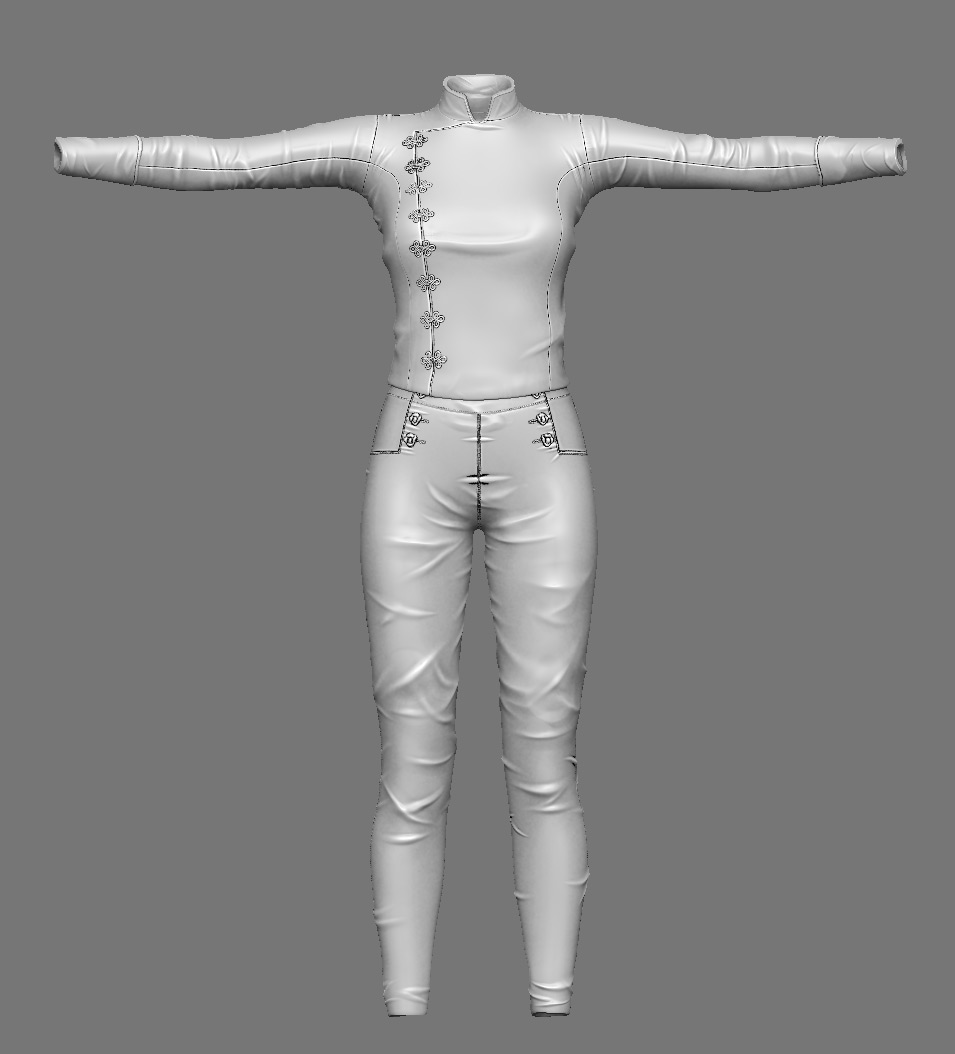
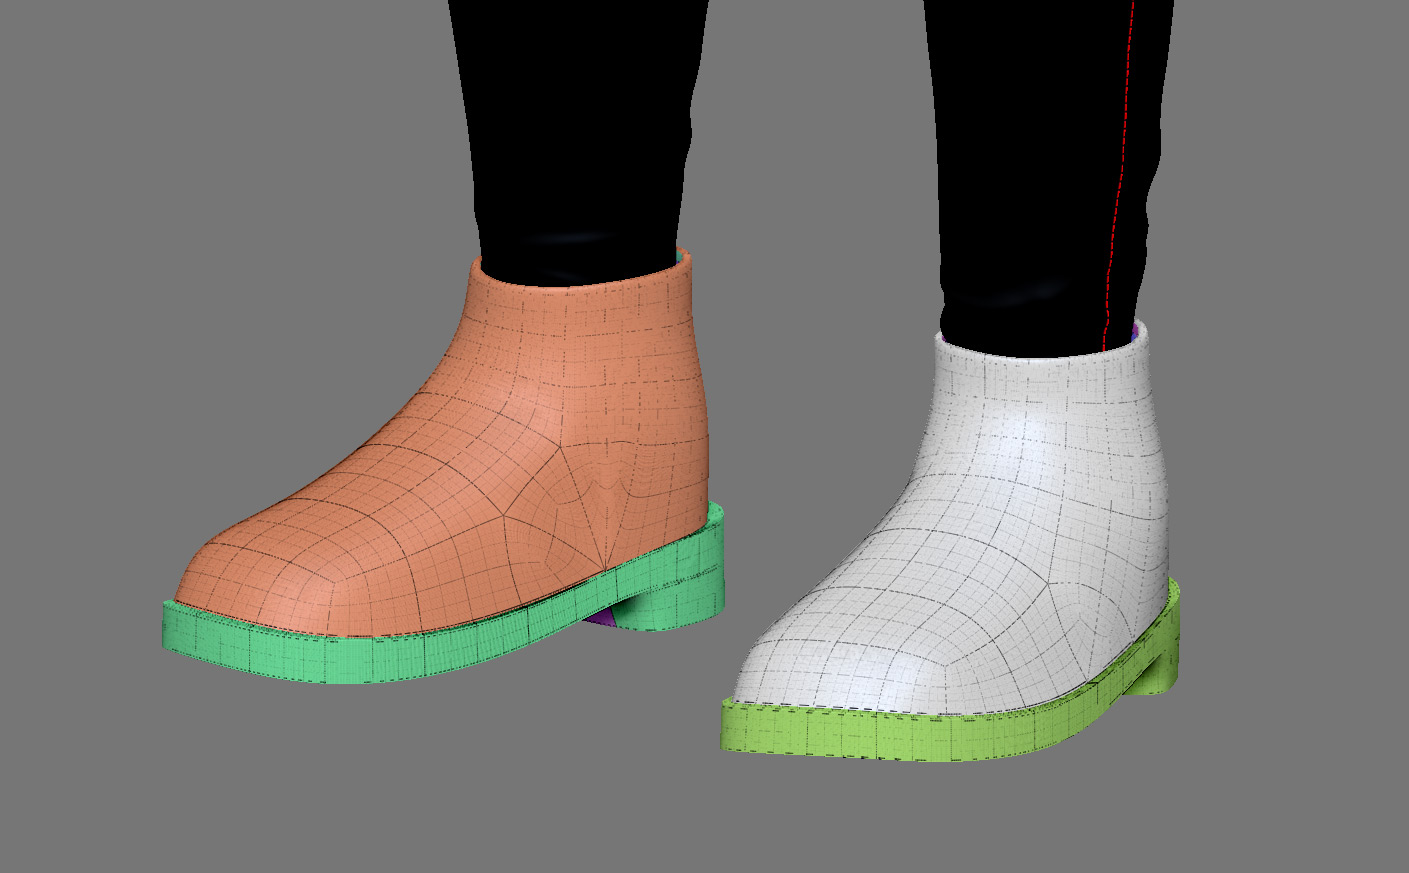
I've completed her jacket, pants and shinguards in Zbrush and have started work on her boots. This is a high res version in Zbrush with cavity maps applied as textures. They fill the indentations with shadows similar to AO maps.

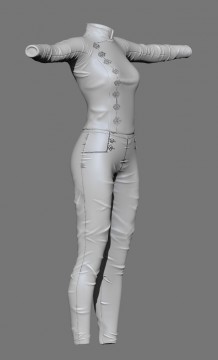
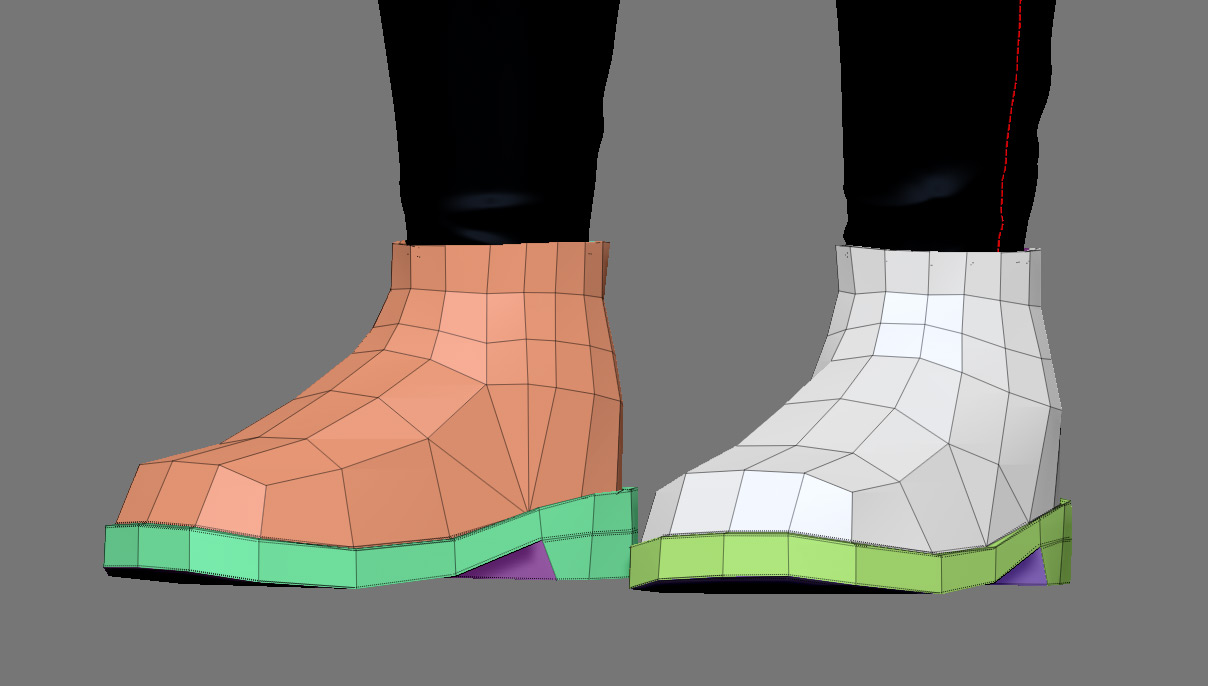
This is the low res game version with the same cavity maps applied but no normal maps so it isn't smooth.

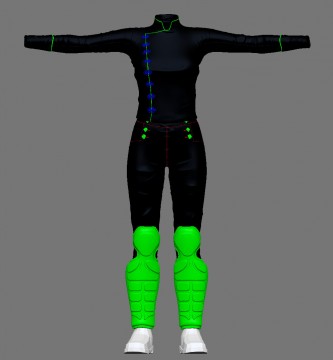
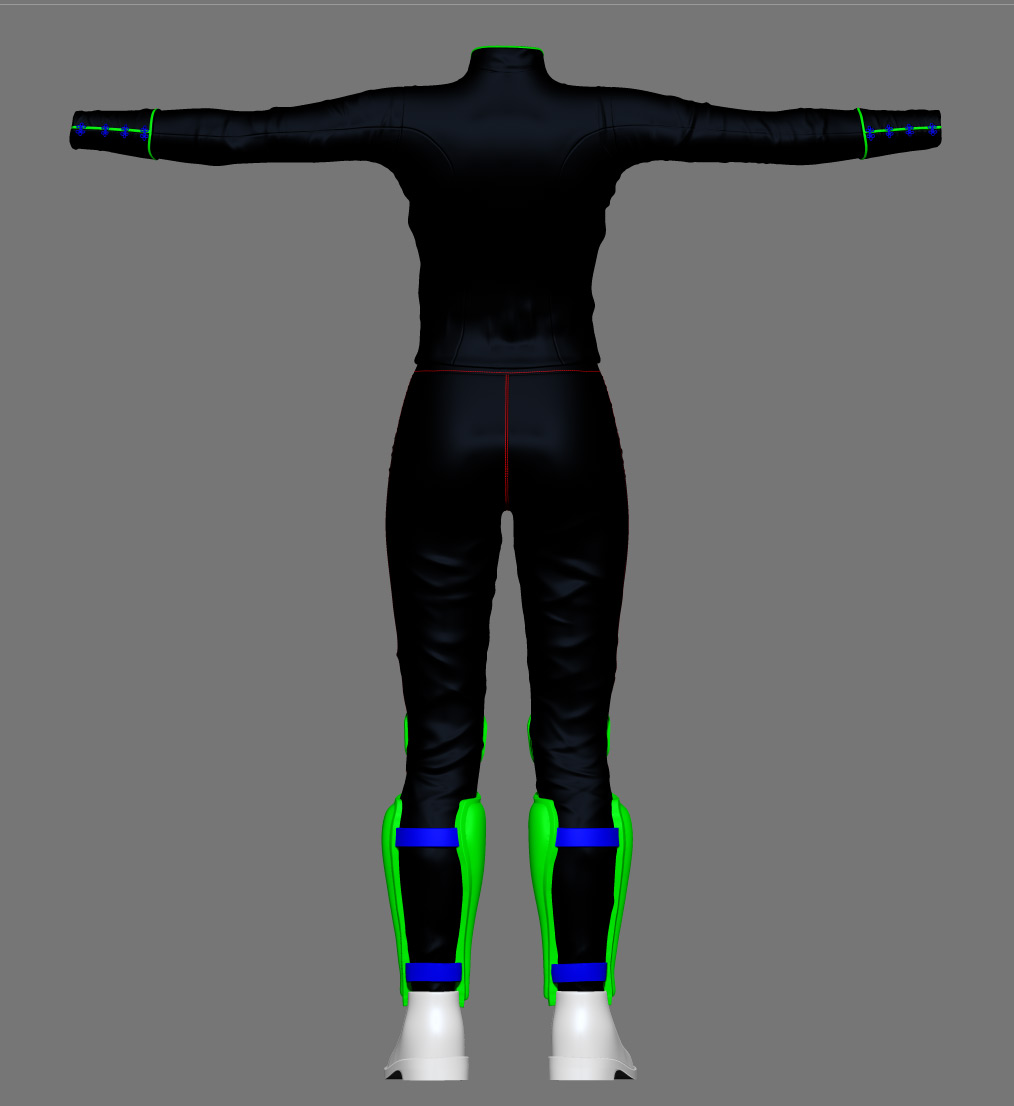
This is the RGB mask painted on the models in Zbrush. The shin guards are painted green for plastic.
The boots start as low res. Once I have the basic shape I'm after I subdivide it multiple times in Zbrush until they are over 6 million tris. Now I'm ready to start carving the high res version that will be used to make the texture, AO, cavity and normal maps.
Less than 1000 tris:
Just over 1 million tris:
Now I'm ready to start sculpting the details into these boots with over 6 million tris to play with. I'm limited by my 32 G of RAM or I would subdivide more. The nice thing about Zbrush is I can change the level of subdivision with a slider because all 7 subdivisions are always present.

Stay tuned!
I've completed her jacket, pants and shinguards in Zbrush and have started work on her boots. This is a high res version in Zbrush with cavity maps applied as textures. They fill the indentations with shadows similar to AO maps.

This is the low res game version with the same cavity maps applied but no normal maps so it isn't smooth.

This is the RGB mask painted on the models in Zbrush. The shin guards are painted green for plastic.

The boots start as low res. Once I have the basic shape I'm after I subdivide it multiple times in Zbrush until they are over 6 million tris. Now I'm ready to start carving the high res version that will be used to make the texture, AO, cavity and normal maps.
Less than 1000 tris:
Just over 1 million tris:

Now I'm ready to start sculpting the details into these boots with over 6 million tris to play with. I'm limited by my 32 G of RAM or I would subdivide more. The nice thing about Zbrush is I can change the level of subdivision with a slider because all 7 subdivisions are always present.
Stay tuned!
Zbrush and Beyond!
posted Thursday, 19 April 2018
Starting Over
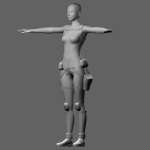
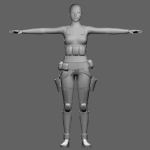
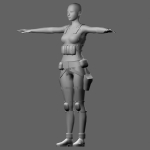
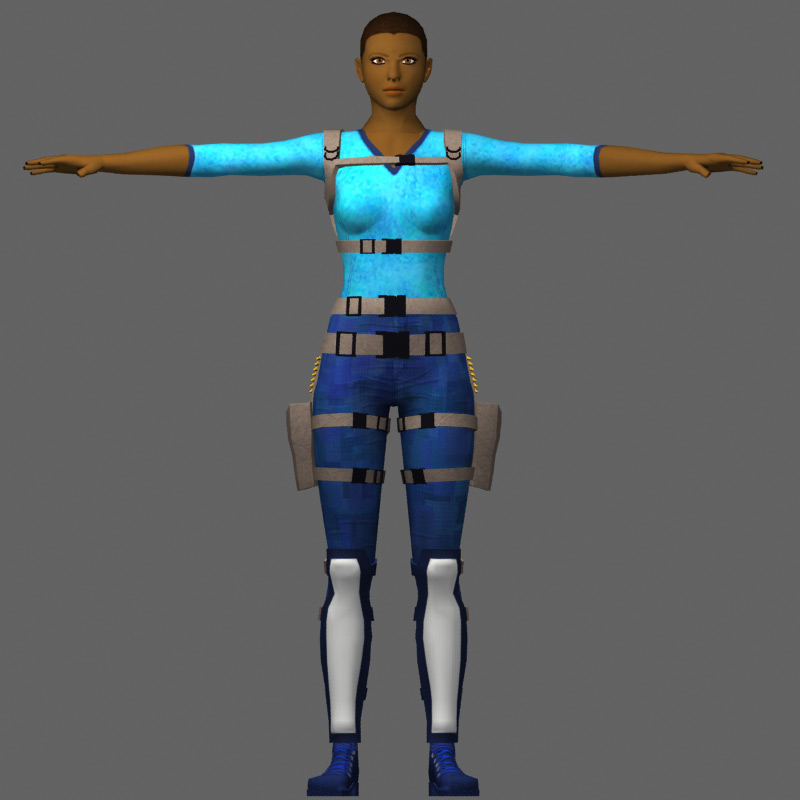
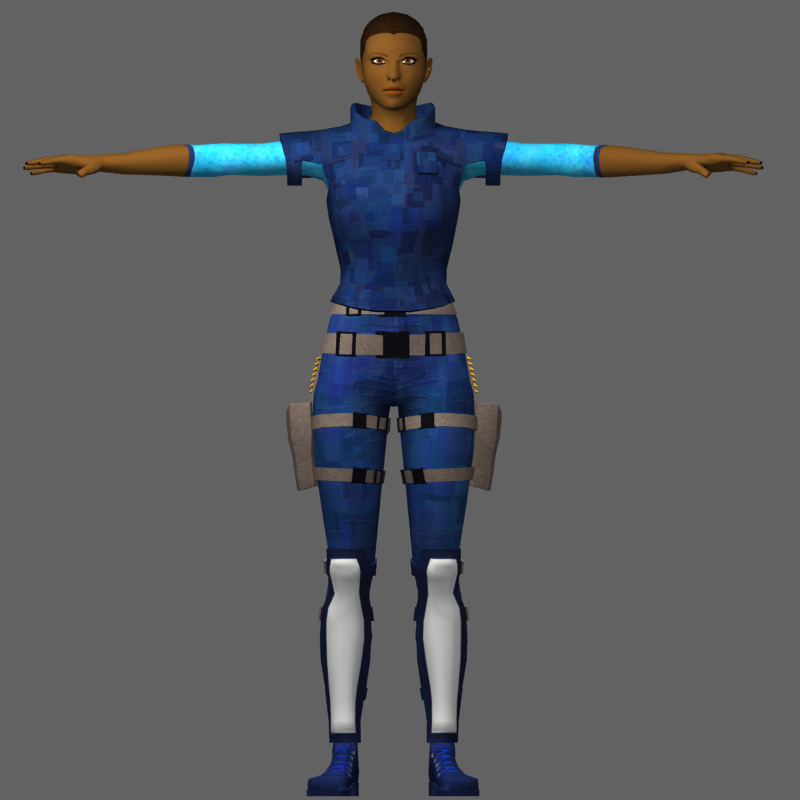
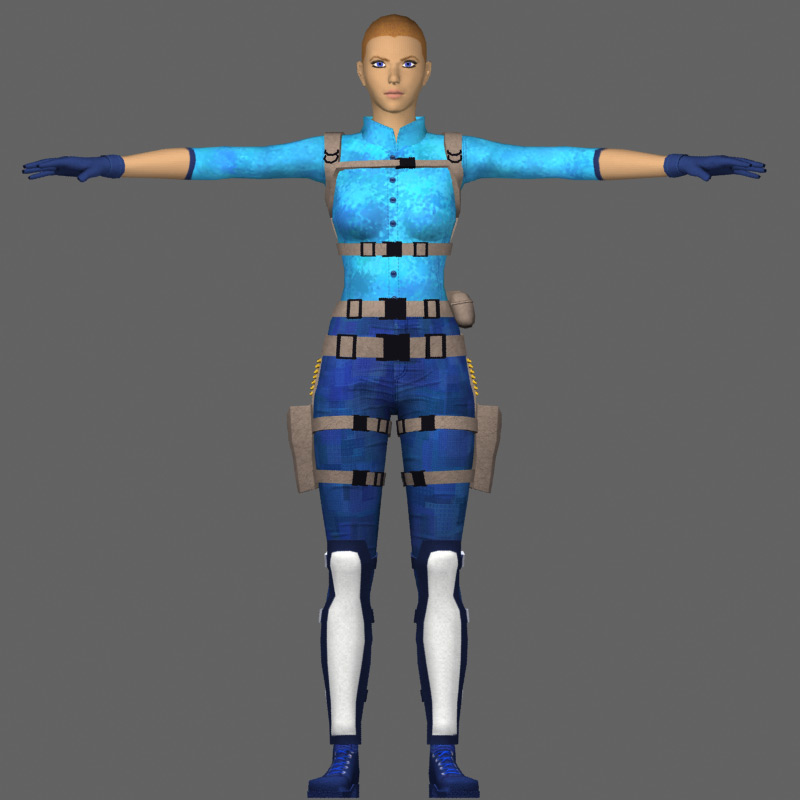
Anyone following FrankieV's videos will have noticed quite a change in the player model Sarah since my last blog. We had to start over with a new base rig so it has been quite a while since I blogged about my progress. I have eight player model outfits completed and am now working on the human morphs and their materials. I bought Zbrush in 2015 to create the meshes and materials for the clothing and gear. I also use Zbrush to do the morphs of the human model, which is a licensed Daz3d base model, and to paint their materials.Zbrush is amazing and awesome, and I'm so glad I had an excuse to buy it to use for UrT Resurgence. I could rant for a while here but I'll get to a preview of the new player models instead.
The hair and human models are place holders in the following images unless otherwise stated. This is a reference scene that FrankieV and I use to visualize our work.


This kind of detail is sculpted into the high resolution mesh in Zbrush which is then baked into the normal map. It's just the push of a button in Zbrush because the low res mesh is in the same tool as the high res mesh so no exporting high and low res meshes nor fiddling with a cage in another program.
I'm currently working on the materials in Zbrush for Yasmine. I've done her head morph and now I am adding skin details like pores and wrinkles that will be baked into her normal map. I will paint her diffuse texture when this detail is finished.
I've finished Anastazie but her finished head isn't in the scene. RabidCow is working on Tom and will be doing Sarah and Pierre. Then we just have Amanda, Charles and Fred's bodies to do before we can move onto the clothes and humans for Jade (from Beijing) , Takeshi (from Tokyo), Soo Min (from Seoul) and the, as of yet, unnamed skate boarder (from London).
comments: Feel free to discuss this on our forums
Character Models Forever
posted Friday, 20 February 2015
It's been quite a while since my last blog entry but I am still doing the same job. I am still working on the character models. I have just finished the mesh for the eighth character. Her name is Soo Min and she is from Seoul, Korea. She is a member of the loosely organized anarchists following Sarah Terror.
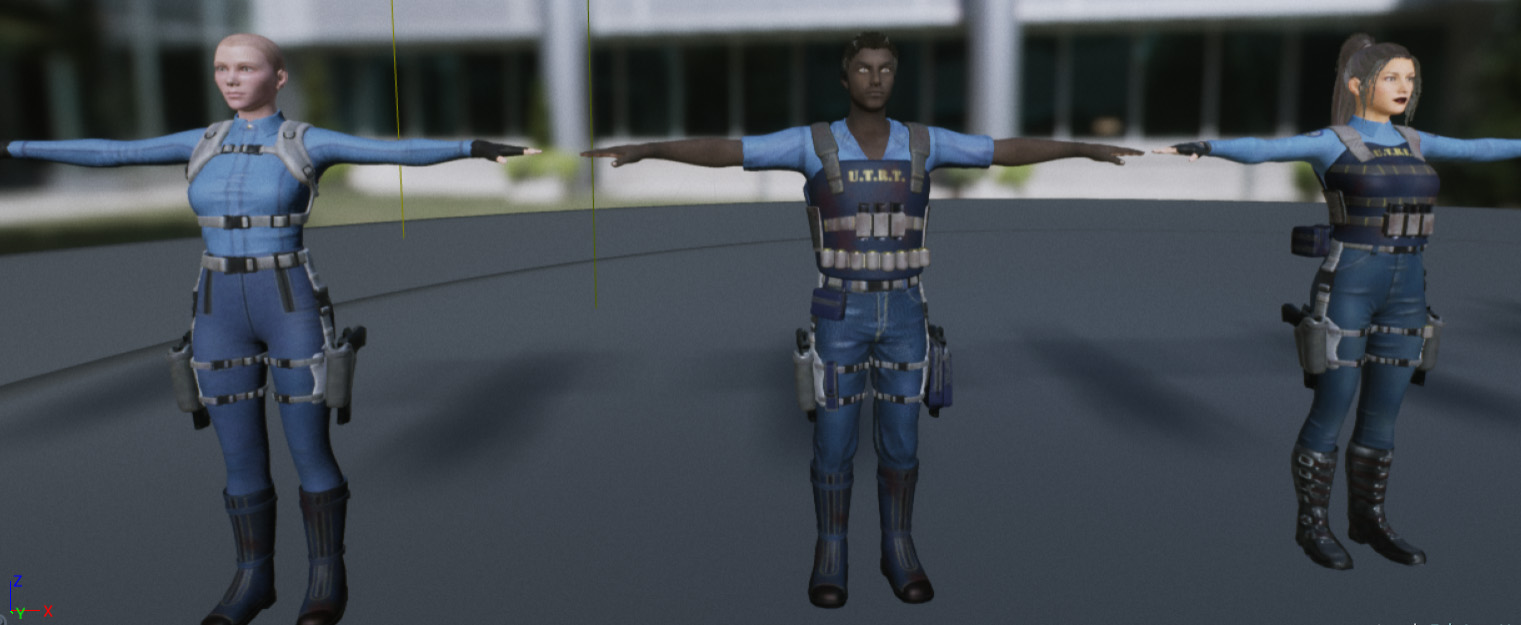
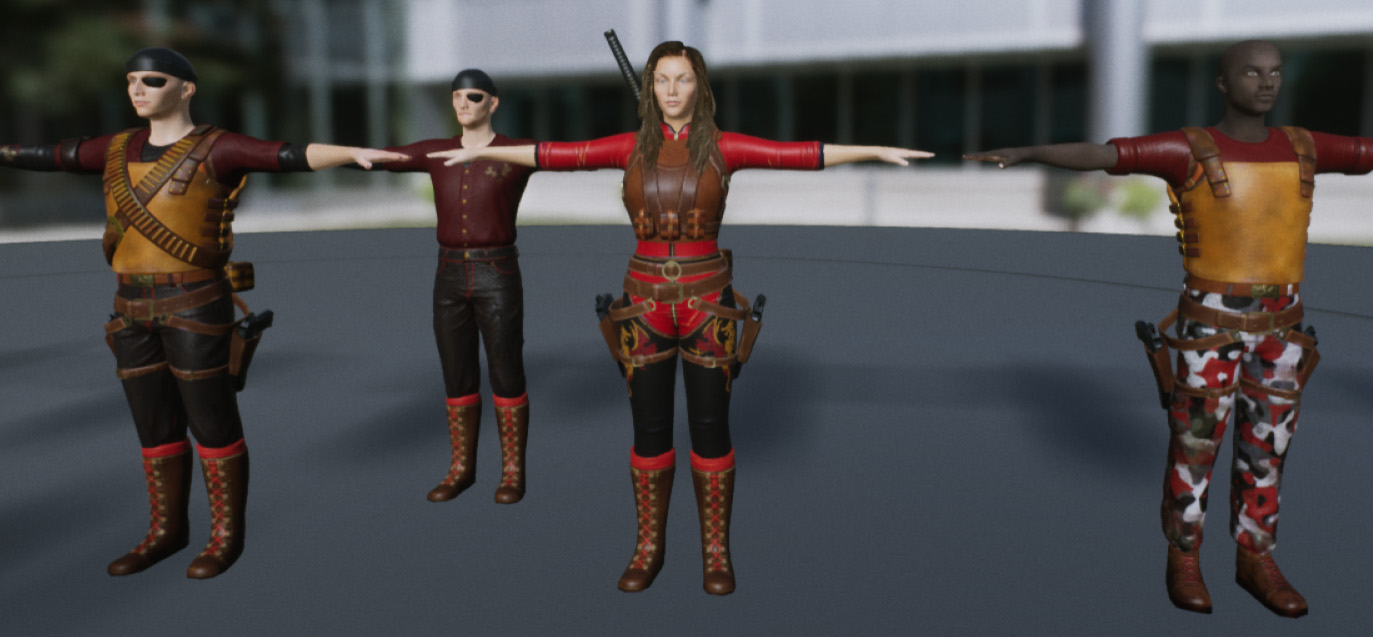
I have finished the meshes for the U.T.R.T. characters Amanda Scott and Anastazie. I made some simple placeholder materials for them to help visualize the team uniforms.
The other character meshes that are ready for surfacing are Sarah (leader of the red team), her soldiers Pierre Vannier and Charles, and U.T.R.T. Leader Tom Striker and soldier Fred Johnson. I have four more to finish before I start making materials for them otherwise known as surfacing.
They are all wearing the classic GI shaved head hairstyle because hair will be an option in HD and you will have several styles to choose from to customize your character.


I have finished the meshes for the U.T.R.T. characters Amanda Scott and Anastazie. I made some simple placeholder materials for them to help visualize the team uniforms.

The other character meshes that are ready for surfacing are Sarah (leader of the red team), her soldiers Pierre Vannier and Charles, and U.T.R.T. Leader Tom Striker and soldier Fred Johnson. I have four more to finish before I start making materials for them otherwise known as surfacing.
They are all wearing the classic GI shaved head hairstyle because hair will be an option in HD and you will have several styles to choose from to customize your character.
comments: Feel free to discuss this on our forums
UE4 Material Instancing
posted Monday, 23 June 2014
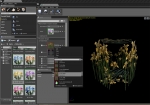
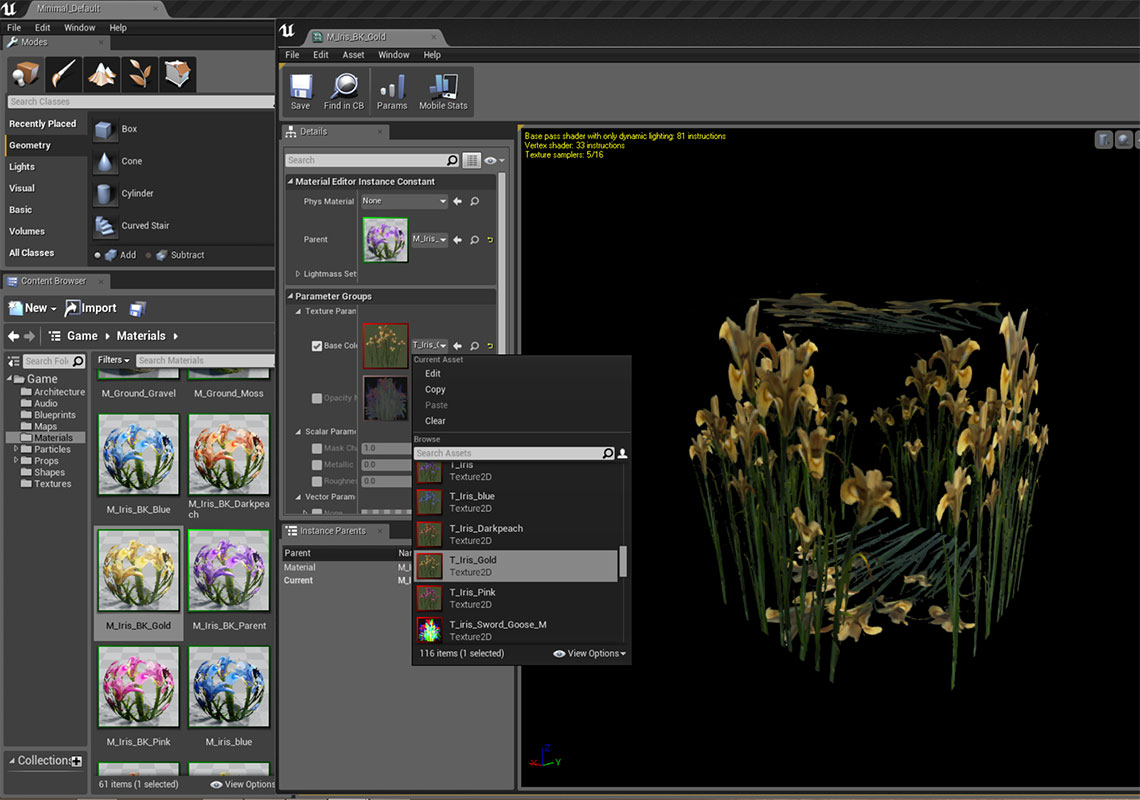
I have been working with my plant textures creating materials in UE4 for them. I have several colours of a Dutch iris as well as several other plants that I want to use. When we were exploring UDK for UE3 HappyDay found a tutorial on using the RGB channels of a diffuse texture as the mask for a transparency instead of using an alpha channel in the texture. This saves memory because the mask texture is saved as a DXT1 instead of the more expensive DXT5. In UE4 you can create a material using parameters for everything from the base texture to the mask texture so you can make one parent and an unlimited number of instances from it for all of your transparent materials. Thanks to HappyDay for teaching me how to add an If statement for the mask.
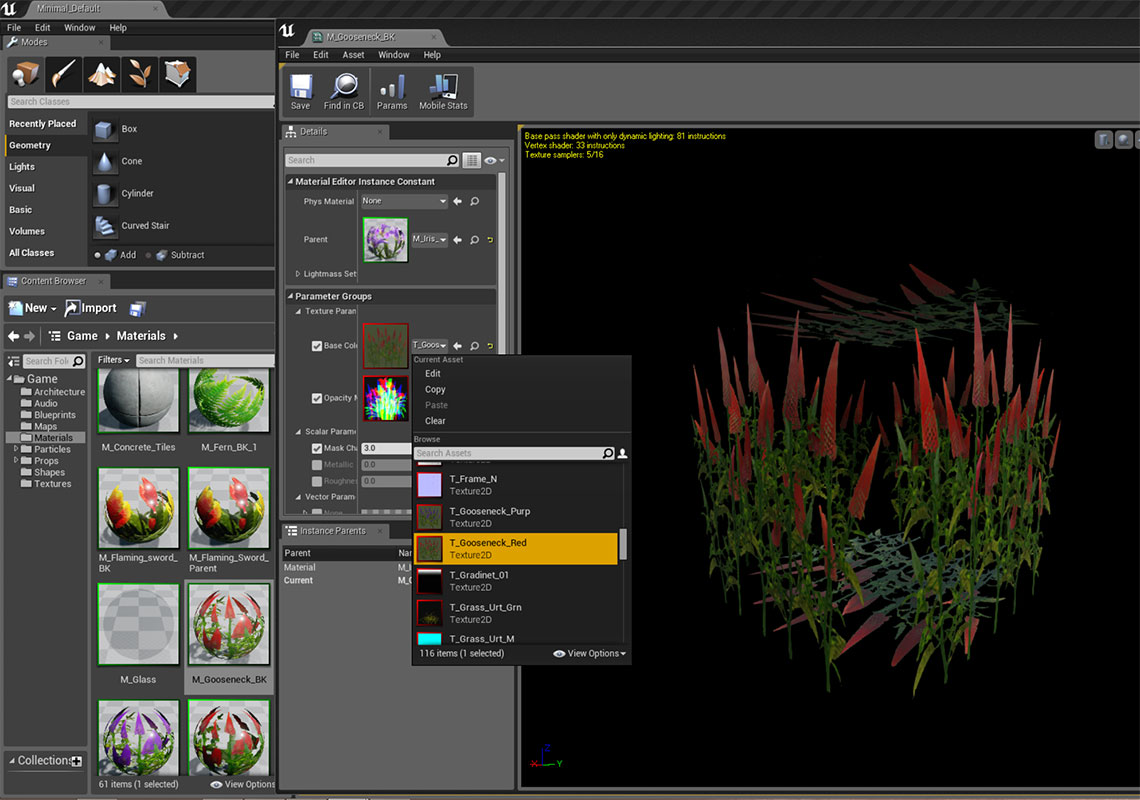
First import your textures and then create the parent material. I chose my Dutch Iris as the parent. I created a simple material with blend mode "masked" so I could add an opacity mask. This parent has a vector parameter for the subsurface colour (the light yellow square), a couple of scalars for metallic and roughness that aren't being used atm (they are there for future use if needed) and an opacity mask with an if statement for its rgb channels. B is a constant set on 2. By changing the value of the scalar connected to input A I can assign which RGB channel the material should use. By using TextureSampleParameter2D instead of just a simple TextureSample I can change the base texture and the mask texture.
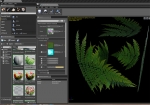
The next image is an instance created from my parent material. As you can see the material editor looks different. In this example I have changed only the base texture.
In the following image I have not only changed the base texture to a different type of plant but also the mask's channel has been changed to 3 which is the blue channel.

In the next example I have changed the texture used for the mask as well as the base texture. This is still an instance of the first parent.
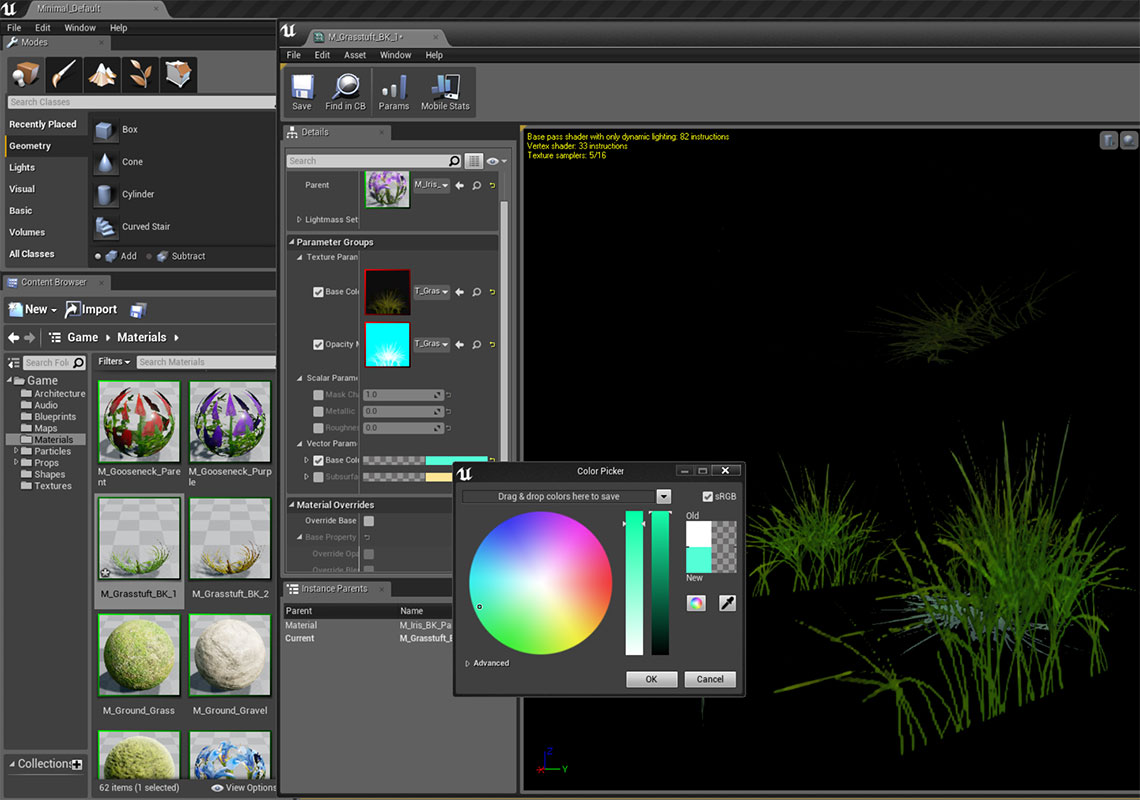
One of the great time saving features of working with instances is if you update the parent it is propagated to all of the children. I decided that it would be handy to be able to change the tint of a base texture so I added a VectorParameter to the base colour path.
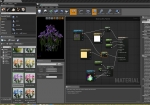
Now I can change the tint of any of the base textures. You can see that the editor has added the new parameter to the menu of functions I can modify.

This technique not only saves time but it also saves memory and improves performance.
First import your textures and then create the parent material. I chose my Dutch Iris as the parent. I created a simple material with blend mode "masked" so I could add an opacity mask. This parent has a vector parameter for the subsurface colour (the light yellow square), a couple of scalars for metallic and roughness that aren't being used atm (they are there for future use if needed) and an opacity mask with an if statement for its rgb channels. B is a constant set on 2. By changing the value of the scalar connected to input A I can assign which RGB channel the material should use. By using TextureSampleParameter2D instead of just a simple TextureSample I can change the base texture and the mask texture.

The next image is an instance created from my parent material. As you can see the material editor looks different. In this example I have changed only the base texture.
In the following image I have not only changed the base texture to a different type of plant but also the mask's channel has been changed to 3 which is the blue channel.
In the next example I have changed the texture used for the mask as well as the base texture. This is still an instance of the first parent.

One of the great time saving features of working with instances is if you update the parent it is propagated to all of the children. I decided that it would be handy to be able to change the tint of a base texture so I added a VectorParameter to the base colour path.

Now I can change the tint of any of the base textures. You can see that the editor has added the new parameter to the menu of functions I can modify.
This technique not only saves time but it also saves memory and improves performance.
Advertisement
Argh, Why'd There Have to be Seams
posted Friday, 20 June 2014
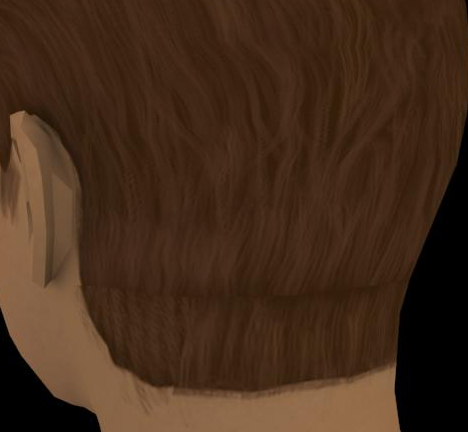
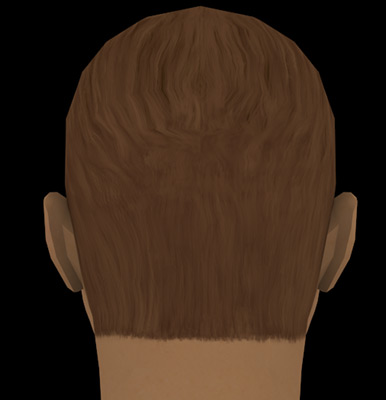
While skinning the hair I ran into a bit of a problem with the seams in the uvw unwrap that made it hard to match the hair as you can see in the image below.
My solution was to change the uvw unwrap and move the bit that was at the top of the neck to the same map as the head so it is now attached to the head's polygons and the only seam I have to deal with is the centre back seam which is much easier to hide. The green lines are the seams.
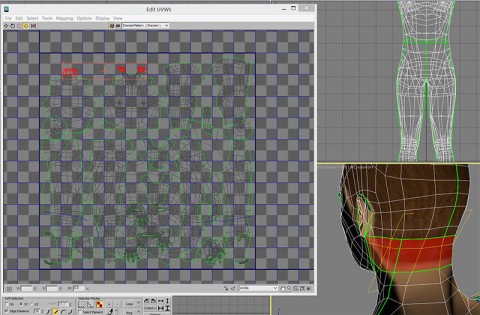
After moving the pieces highlighted in red it was much easier to skin the hair.
BladeKiller Is UVW Unwrapping
posted Sunday, 11 May 2014
It's been a long time since I blogged or what at the time passed for a blog. I used to have a personal website on polycount.com when Q3 was new and wonderful artists in the community helped teach me how to skin. Thanks to Kalish for making it possible to write these blogs and share our UE4 Urban Terror progress with you.
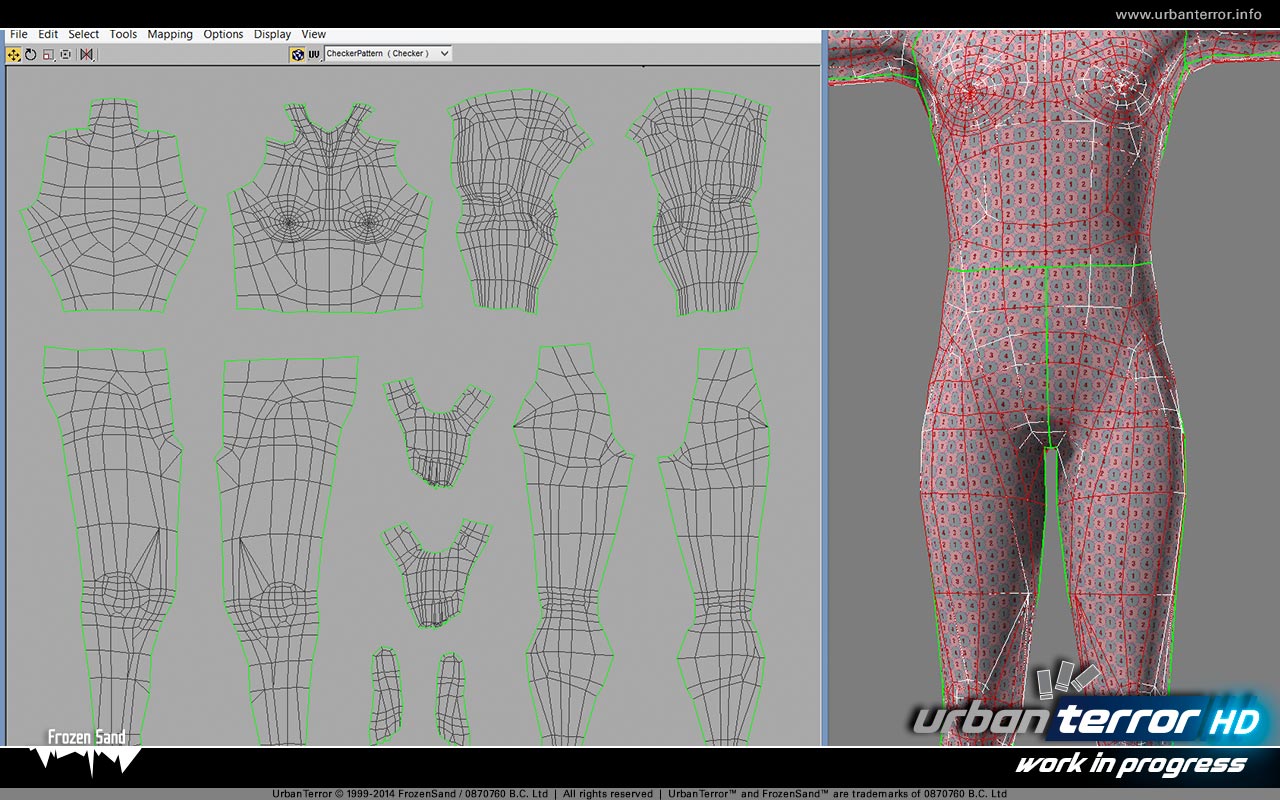
One of my favourite pass times is uvw unwrapping a 3ds max model, especially player models, so it can be textured. I'm very fussy about how I like my uv's laid out after having suffered at the hands of other modelers and their horrid uvw unwrapping. Some of the early Q3 models overlapped body parts. This makes me a bit odd since most normal people detest this task but to me it's a fun puzzle to solve. I am currently working on a male player model for UE4 Urban Terror HD.
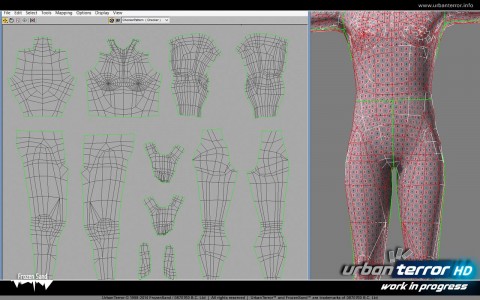
In this image I have unwrapped his torso, arms and lower body. You may have noticed that the model is basically naked. The gear like holsters, belts, boots will be added as separate models later. Previously, these parts were either part of the main model or simply painted on. This new method allows for flexibility and efficiency.
Stay tuned.
One of my favourite pass times is uvw unwrapping a 3ds max model, especially player models, so it can be textured. I'm very fussy about how I like my uv's laid out after having suffered at the hands of other modelers and their horrid uvw unwrapping. Some of the early Q3 models overlapped body parts. This makes me a bit odd since most normal people detest this task but to me it's a fun puzzle to solve. I am currently working on a male player model for UE4 Urban Terror HD.
In this image I have unwrapped his torso, arms and lower body. You may have noticed that the model is basically naked. The gear like holsters, belts, boots will be added as separate models later. Previously, these parts were either part of the main model or simply painted on. This new method allows for flexibility and efficiency.
Stay tuned.
Advertisement